

As promised, I’m back with the tutorial for the interactive Birthday Card that I showed you yesterday.
Let’s just have a quick look at the card with this animated gif…
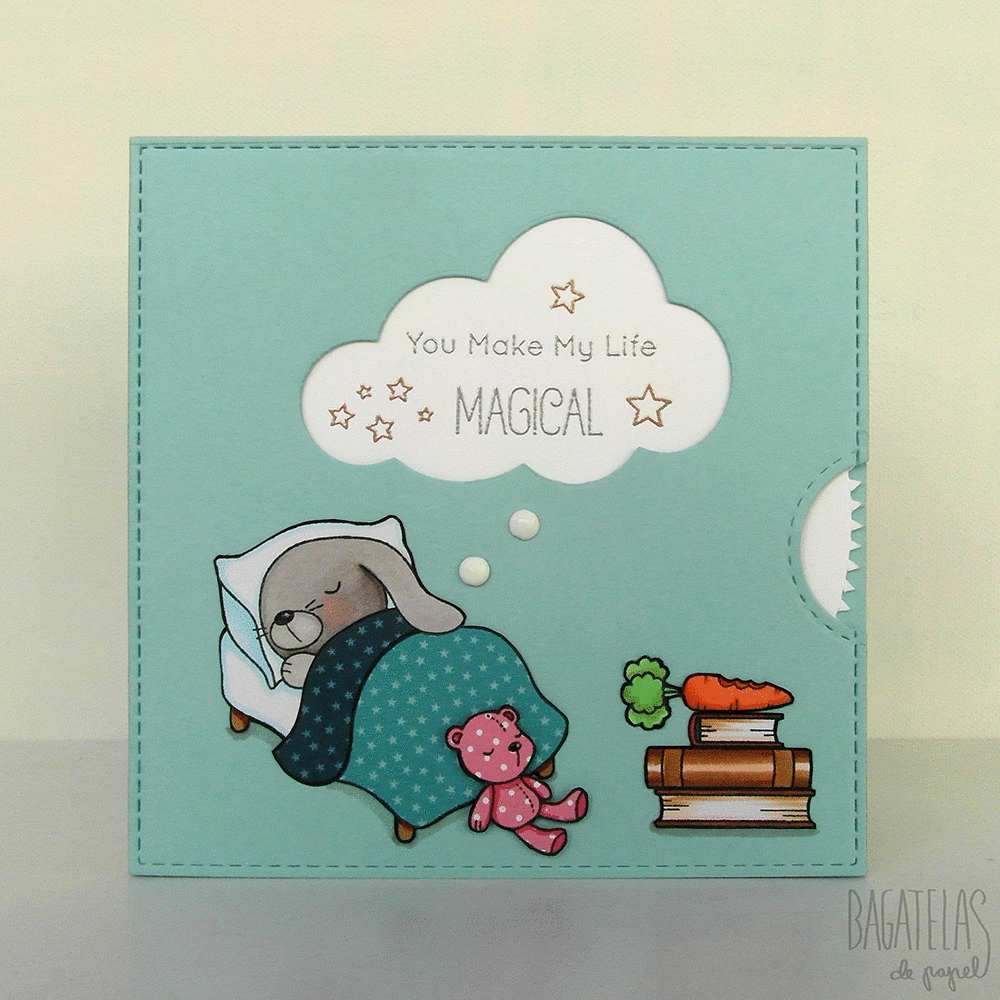
We make the disk rotate to reveal what that adorable bunny is dreaming about… The mechanism couldn’t be easier and the followers of my blog know that I’ve used it several times, for example in these two cards. If you click on any of them, you can visit the corresponding tutorials.


Let’s get down to business. I used the following material, but you can always adapt the tutorial to fit your materials… for example the main character doesn’t have to be sleeping and if you plan on using smaller sentiments, you don’t need such a large cloud or circle die.
- a circle that measures about 4 1/2″ in diametre cut out of white heavyweight cardstock (I used Neenah 110lb which is also perfect for Copic colouring)
- A square panel that measures about 5″ x 5″. I chose the tone “Surf Blue” by Simon Says Stamp.
- The stamp sets Somebunny I Love, Somebunny, Magical Dragons & Class Act by My Favorite Things.
- Thin adhesive foam squares
- Gold and platinum embossing powder or whatever you chose to stamp your sentiments with
- A 5″ x 5″ piece of acetate
- A cloud shaped die (mine is the second smallest die from an older set by Die-namics called Jumbo Cloud Stax
- A small circle die (about 1″ in diametre) to create the opening through which we can rotate the disk.
- 2 small white brads (I didn’t have any, so I heat embossed a couple of silver-colored ones)
Let’s start by cutting the disk. If we use a circle die with a faux stitched border, like this one from LPC, it’s a lot easier to cut the jagged border.

We just cut the space between the stitches in a triangle shape. The result is very symmetrical even if we don’t do it perfectly.
The next step is to plan the placement of our elements to make sure that everything fits. It’s very important to check that the circular opening, that we will cut in order to be able to rotate the disk, is not too large, because the stamped elements would show through it. In other words distance B should be equal to or less than distance A.

I die cut the panel out of acetate using the largest die from the set Stitched Rectangles by LPC. I also marked the center of the circle with a needle to see that the brad would not interfere in the design.
Once I was happy, I adhered the dies to the acetate and the acetate to my die cut 5″ x 5″ panel with washitape and rolled it through my Big Shot. Most dies cut through thin acetate + cardstock with no problem.

Phew, the hardest part is over! Now to the fun stuff… stamping the elements! I adhered the disk to the panel, with washitape (on the back) and pricked a hole through the panel to mark the placement of the brad.
I stamped the first sentiment from the Magical Dragons set through the cloud…

…and traced the outline of the cloud with a pencil.

This way I could easily tamp the rest of the elements.

Don’t forget to erase all the pencil lines!

Here are all the elements of the card ready for assembly… oh wait, the 5″ x 10″ card base is missing from the picture.

After adhering everything, the last step is to add some adhesive foam squares in a way that they don’t interfere with the mechanism.

Here’s a last look at the finished card. I really have to start making video tutorials, because some steps are just easier to show than to explain with words. ^_^ See you next time!
This post is also available in: Español

