
Hi there! Today I’m stopping by to invite you to check out my delay action slimline slider card tutorial at the MFT YouTube Channel.

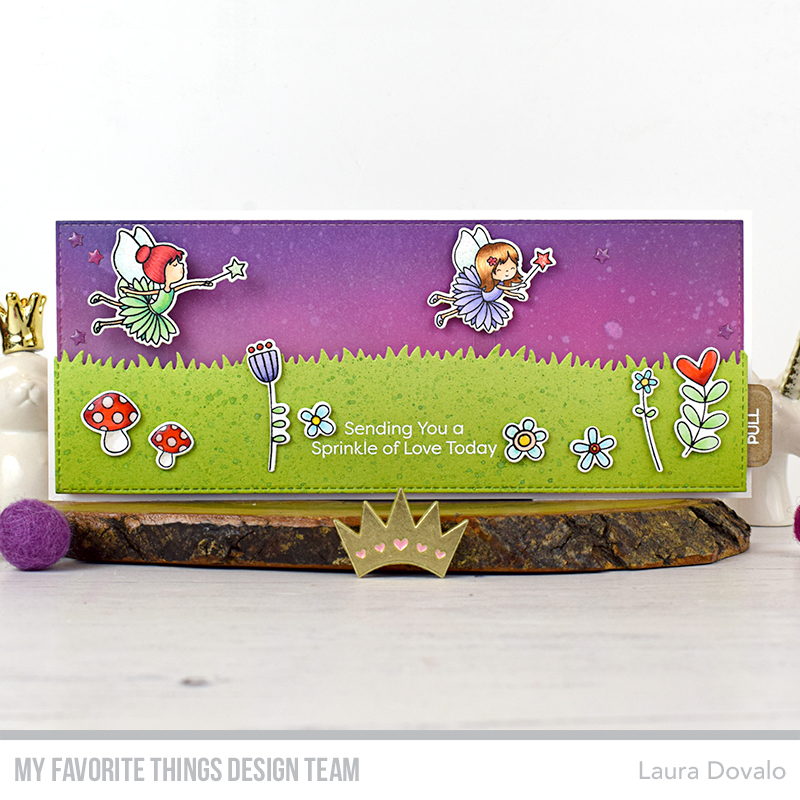
It features images from the adorable Fairy Special stamp set and a fun mechanism, which is a version of the one that I saw in THIS amazing card, created by Ali from Ali Loves Cardmaking. She calls it a pull-push slider card. Check out my card in action, below:
As you can see, when I pull on the tab, the first fairy starts moving and when she reaches the middle, the second fairy joins her. They’re almost playing a game of fairy tag!

The mechanism actually uses two pull tags that are place right on top of each other! The kraft colored one is made out of 1/16″ thick chipboard. It has a channel which allows us to link it to the second, thinner pull tab (made of two layers of card stock).

In the tutorial you will learn that you don’t need specific dies if you’re good with a craft knife…

I won’t bore you with more details… you’ll learn everything about this card in the tutorial. Thanks for stopping by!
Measurements for delay action slider card
Card base: 8 ½” x 7” (21,6cm x 17,7cm)
Card panel: 8 ¼” x 3 1/4” (21cm x 8,3cm)
Pull tab 1 (sturdy): 7 ¾” x 1” (19,3cm x 2,5cm) with 1/4” x 2.5” (6mm x 6,4cm) channel starting 1” from the left edge.
Pull tab 2: 7 ¾” x 1” (19,3cm x 2,5cm)
Acetate strips: 3/8” x ? (1cm x ?)
Paper strip for collars: 3/8” x ? (1cm x ?)
List of MFT Products used for delay action slider card
- Fairy Special stamp set
- Fairy Special Die-namics
- MSTN Sending Sunshine & Smiles
- MSTN Sending Sunshine & Smiles Die-namics
- Spin & Slide Channels Die-namics
- Slimline Starter Die-namics
- Slimline Grassy Hills Die-namics
- Twist & Turn Interactive Die-namics (1” circle)
- Smooth White Card Stock
- Sour Apple Card Stock
- Extreme Black Hybrid Ink
- Jalapeño Popper Premium Dye Ink
- Prickly Pear Premium Dye Ink
- Field Day Premium Dye Ink
- Sour Apple Premium Dye Ink
- Slider Elements
This post is also available in: Español

