
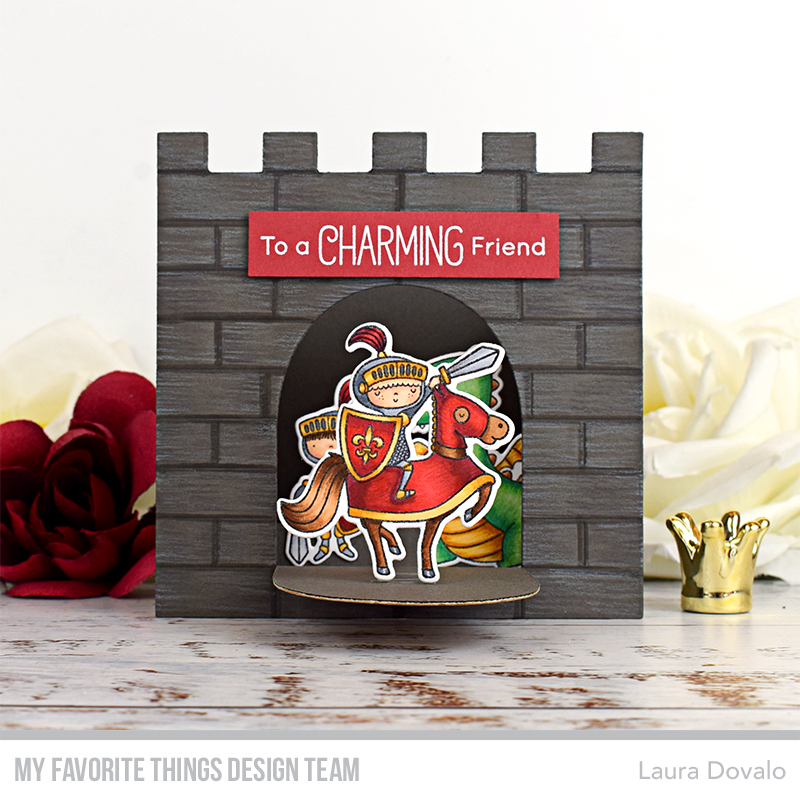
For Day 4 of the MFT January Release Countdown I’m sharing a fun castle box card made with the versatile and detailed Castle Drawbridge Die-namics.

Before I get into more details, let’s check it out “in action” in the animated gif below:

I can think of so many ways to use this die set… This time I simply die cut the pieces out of Eiffeltower, Kraft and Gold Shine card stock and added some texture with Copic markers. Then I adhered the castle front to the structure that I created with the Shadow Box Die-namics. To make the opening for the door I simply traced it with a pencil and cut it with my scissors…

The die set includes some cool chains, which I didn’t use this time because I wanted to place one of the knights standing on the door and there wasn’t enough room for everything. As you can see in the picture below, I used a little pop up rectangle made out of acetate for the knight. I also placed the other elements in such a way that they don’t interfere with each other.

For the sentiment I made a little red banner, with a white embossed phrase from the BB Magical Dragons stamp set, which I popped up with some thin foam tape.

This castle box card made me remember my triple interactive Birthday card, that I made for the 2017 Card Design Superstar Challenge. You can watch the tutorial on my YouTube channel, HERE.

As you can see, once folded, the card fits perfectly inside an A2 envelope. As always, I now invite you to check out what my teammates made with today’s featured products, on the MFT Blog. Thanks for stopping by!
This post is also available in: Español

