
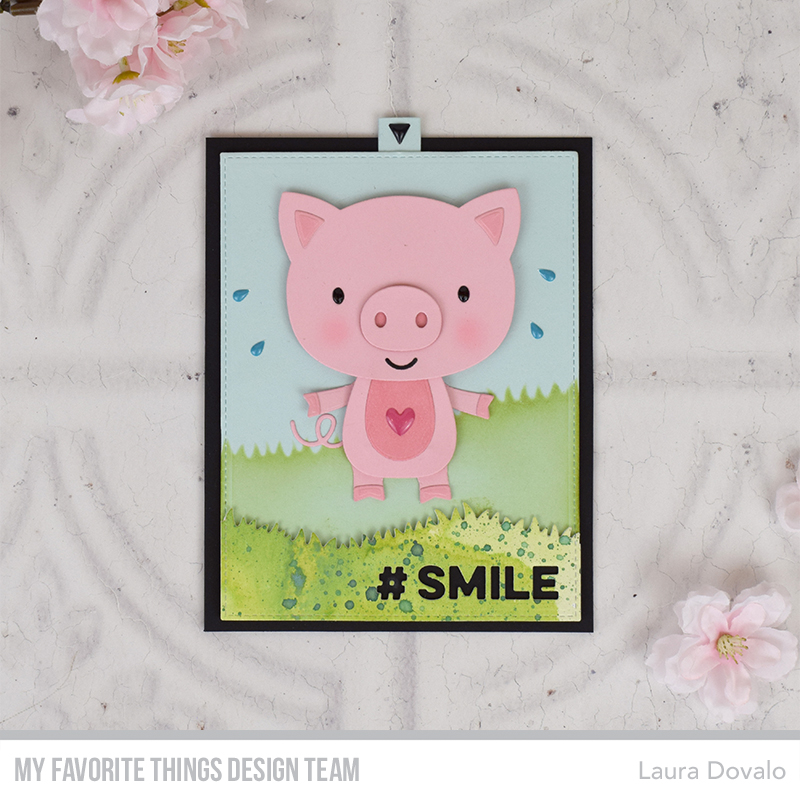
Howdy! The big day has arrived and the April Release is finally available at the MFT store. To celebrate it, I’ve made a fun interactive piggy card that I’m sure you’ll enjoy.

I love the big critter Die-namics and I knew that I also wanted to make an interactive card featuring the Little Piggy Die-namics. HERE you can see my interactive fox card and HERE you can check out the Interactive Raccoon Tutorial that I made for the MFT YouTube channel. But before I tell you more about the card, let’s look at it in action:

The poor thing is getting in shape for the summer and “sweating like a pig”, ha ha ha. I made a video tutorial (Interactive snow angel card tutorial) with the same mechanism a year ago, but here’s part of the process in pictures:

- Die cut the pig’s body and draw the legs, like in the first picture, then cut them out.
- Partially die cut the arms and draw a circular shape at the end of each one. Also cut these out.
- Punch two small holes in each extremity.
- Die cut one of the pull tabs from the Interactive Pull Tabs Die-namics and score it in the middle to double it up.

-
- Die cut two of the bodies from the Raccoon Cutie Die-namics or just modify the piggy’s body by cutting its legs off… You’ll need one of them to position the body parts and the other one to cover the mechanism. The inner hole has to be on the pull tab and the outer hole off the pull tab (see the last picture).
- Temporarily attach the pull tab and the body parts to the card panel.
- Draw a mark at about 1″ above the body…

- Use a craft knife to cut a slit for the pull tab (it’s going to be hidden by the head).
- Use thread to attach the arms and legs to each other as well as to the pull tab: Insert the needle with thread through the left hole of the right arm, then through the upper right hole of the pull tab. Then out through the left hole of the pull tab and through the back of the left arm’s right hole. Tie the two thread ends together and secure with a drop of Glossy Accents. Repeat the same steps with the legs. It’s a lot easier to understand this in my Interactive Snow Angel Card tutorial.
- Insert the pull tab through the slit and then use mini brads to attach the body parts to the card panel. They should now rotate in unison when you move the pull tab back and forth.
- Add foam adhesive to the pull tab and attach the head.
- Decorate the rest of the card.

Tell me, did the card make you smile? If you have any questions, feel free to ask. Now, please head on to the MFT blog to be linked to the awesome projects that my teammates and a couple of MFT friends have created using the April Release.
Be sure to leave some love along the way for a chance to win one of the TWO $100 gift vouchers to the MFT shop. The random winners will be chosen from the comments throughout the hop.
List of products used for the interactive piggy card
This post is also available in: Español

