

Today I’m back with another tutorial for MFT, this time it’s to show you how I got this adorable couple to hold hands using some partial stamping.

Let’s have a look at the original stamps and then I’ll explain the partial stamping technique that I used, step by step. It’s a lot easier if we use a MISTI or a clear DVD case to do our stamping.

As you can see, their arms are hanging quite near their bodies, but we’ll take advantage of that small separation to rotate them a bit…
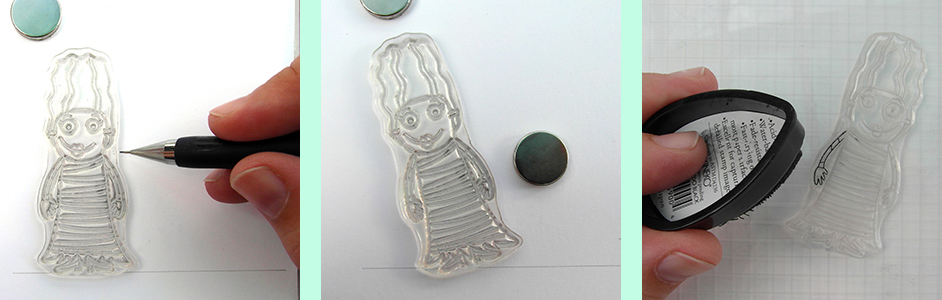
Draw a straight pencil line on the paper and place the stamp of the girl on it. Make a mark at the height of the shoulder. Now rotate the stamp counterclockwise, respecting the previously drawn mark and ink only the arm that will be stamped on the right side.

Stamp the arm and place the stamp in its initial position. Cover the arm of the stamp with a piece of Post-it…

…and ink the rest of the stamp. Remove the piece of Post-it and stamp. The girl is almost done.

Make a mask for the hand and lower arm out of Post-it or masking paper and adhere it in its place. Put the Frankenstein stamp on the paper and rotate it so that his and her hands coincide… Partially ink and stamp his arm. Place the stamp in its initial position and ink everything but the arm. Stamp…

…and they’re both ready. Remove the mask from her arm and color the characters.

I added a simple veil and rhinestones, both to her hair as to his bat bow tie. A drop of Glossy Accents to her lips, a couple of matching sequins and that’s it.

Hope you had fun! See you next time!

