
Aunque estoy al tanto de las tendencias en el scrap, no siempre las sigo… este era el caso del “foiling”. En un principio no me llamaba nada la atención, pero gracias al reto nº 51 de 3flowers, propuesto por Mariola, me hice con una pequeña cantidad de foil dorado y me puse a experimentar… Aquí tenéis el resultado:
Even though I’m up to date with the latest tendencies in scrapbooking, I don’t always follow them… That was the case with foiling. At first it didn’t catch my attention at all, but thanks to challenge #51 at 3flowers, proposed by Mariola, I bought a small amount of gold foil and started experimenting… Here’s the result:

El tema lo elegí porque me encanta el art decó y porque mi idea era combinar el reto de 3flowers con uno CAS de palabra clave: “vintage”, pero llegué demasiado tarde para este último.
I chose the theme because I love art deco and because my idea was to combine the challenge at 3flowers with a vintage-themed CAS challenge, but I was too late.

Os aseguro que la tarjeta es más bonita en la realidad, pero es muy difícil fotografiar el dorado brillante del foil con una cámara digital básica como la mía…
I assure you that the card is more beautiful in real life but it’s very difficult to capture the shiny gold foil with a basic digital camera like mine…

Me inspiré en el sencillo diseño geométrico y en la paleta de colores de esta preciosa taza y plato de los años 30:
I was inspired by the simple geometrical design and palette of this beautiful Thirties cup and saucer:

Para crear mi tarjeta usé este troquel de arco iris…
I used this rainbow die to create my card…

y uno de los troqueles del set “Feathers and Arrows” de Die-namics. Adivinad cuál 😉
and one of the dies of the “Feathers and Arrows” set by Die-namics. Guess which one 😉

A continuación os explicaré parte del proceso aunque si queréis ver un tutorial más completo sobre el “incrustado”, una de mis técnicas favoritas, podéis hacer clic AQUÍ.
Next I’ll explain parts of the process although if you want to see a detailed tutorial on the inlay technique, one of my favourites, clic HERE.
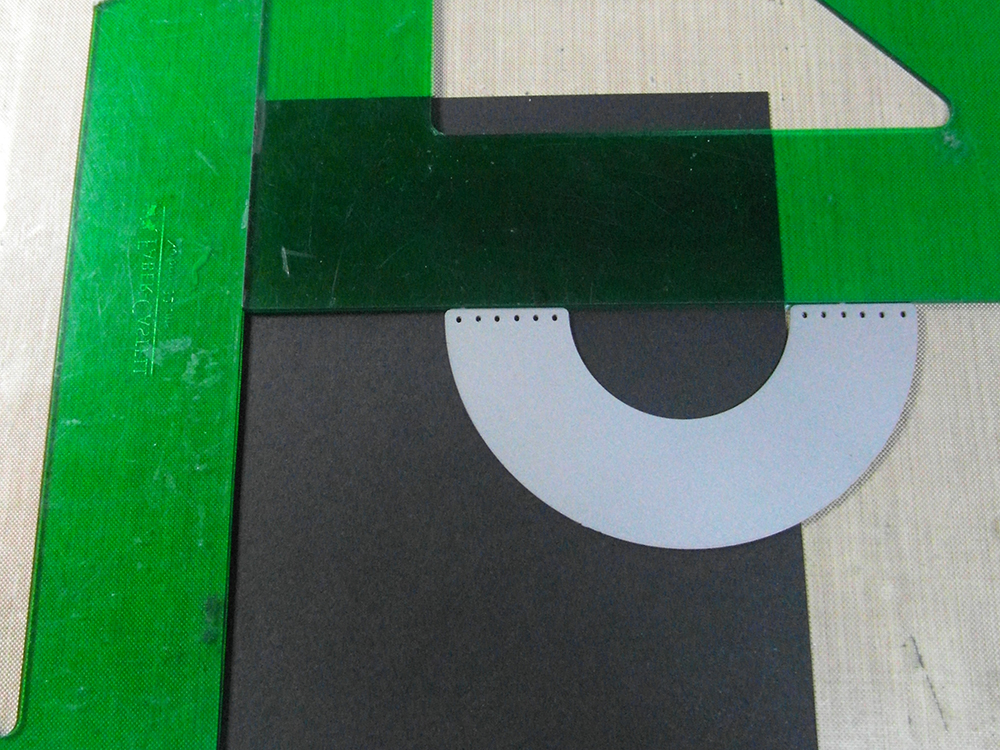
1. Empecé cortando la forma del arco iris (el negativo del troquel) en la que incrustaría las franjas blancas y negras:
1. I started by diecutting the shape of the rainbow (the negative part of the die) in which I would inlay the black and white stripes:

2. Pegué un rectángulo de papel de impresora cubierto de cinta de doble cara por detrás del panel negro e inserté todas las piezas en el hueco. Después adherí el troquel del “tallo” de forma temporal al panel con unos trozos de cinta de carrocero.
2. I glued a rectangle of printer paper covered with double sided tape on the back side of the black panel and inserted all the pieces in the opening. Then I temporarely attached the “strip” die to the panel with pieces of painters tape.

Repetí el mismo paso tres veces más moviendo el troquel cada vez un poquito más hacia la derecha y hacia arriba…
I repeated this step three more times, moving the die to the right and upwards each time…

3. Ahora tocaba preparar el foil… Pegué un trozo de cinta de doble cara ancha de la marca Sookwang a un trozo de cartulina negra y troquelé las cuatro tiras finas que irían incrustadas en los huecos que acababa de cortar. Después las pequé contra el lado mate del foil:
3. Now it was time for the foiling… I glued a piece of wide Sookwang tape to the back of a piece of black cardstock and die cut four thin strips that would be inlaid in the slits that I had just cut. Then I glued them to the matt side of the foil:

4. Con una plegadora de hueso froté suavemente por detrás de cada tira antes de despegarlas del foil… qué nervios!
4. With a bone folder I gently rubbed the back of each of the strips before removing them from the foil… How nerve racking!

5. Quedaron bien, así que cubrí mi base de tarjeta negra, que después cambié por una blanca, con cinta de doble cara e incrusté las finísimas tiras doradas en los huecos…
5. They turned out OK so I covered my black cardbase, which I then switched to a white one, with double-sided tape and inlaid the thin golden strips…

6. Por último recorté una franja más ancha del trozo de cartulina con Sookwang, la cubrí con foil y monté la tarjeta. A todo esto, hasta el último momento no tenía claro dónde iría el sentimiento, pero me acordé de un set de formas troqueladas de estilo art decó que me regaló mi hermana Luisa hace tiempo y usé uno de los círculos que traía:
6. Lastly I cut a wider strip out of the cardstock with Sookwang, covered it with foil and assembled the card. Until the last minute I didn’t know where I would place the sentiment, but I remembered a set of art deco die cuts that my sister Luisa had given me and used one of the circles from it:
Espero que os haya gustado mi “sencilla” tarjeta ^_^ ¡Hasta la próxima!
I hope you liked my “simple” card ^_^ See you next time!

